

Deploying a React app to Kubernetes can be daunting but easier. With Docker and Minikube, you can create a local Kubernetes cluster that you can use to test and deploy your app. Once you're happy with your app, you can deploy it to a production Kubernetes cluster on EKS.
This tutorial walks you through deploying a React app to Kubernetes with Docker and Minikube on EKS. We'll create a React app and then build a Docker image. Next, we'll create a Kubernetes cluster using Minikube, then deploy the app to the cluster. Finally, you'll test the app and ensure it works correctly.
By the end of this tutorial, you'll have a basic understanding of deploying React apps to Kubernetes with Docker and Minikube on EKS. So let's get started!
Prerequisites
Before you can deploy your React app to Kubernetes, you need to install the following prerequisites:
- Install Docker
Docker is a containerization platform that allows you to package your application and its dependencies into a single image. This makes it easy to deploy your application to any Docker environment.
To install Docker, follow the instructions on the Docker website: https://docs.docker.com/get-started/.
- Install Minikube
Minikube is a local Kubernetes cluster that you can run on your computer. This is a great way to learn about Kubernetes and test your applications before deploying them to a production cluster.
To install Minikube, follow the instructions on the Minikube website: https://minikube.sigs.k8s.io/docs/start/.
- Install Kubectl
Kubectl is a command-line tool that you use to interact with Kubernetes clusters.
To install Kubectl, follow the instructions on the Kubectl website: https://kubernetes.io/docs/reference/generated/kubectl/kubectl-commands.
1. Create a React App
Once you have installed the prerequisites, you can create a React app.
To create a React app, you can use this command.
npm create-react-app quotes
This will create a new folder called quotes with your React app. You can then start the app by running the following command:
cd quotes
npm start
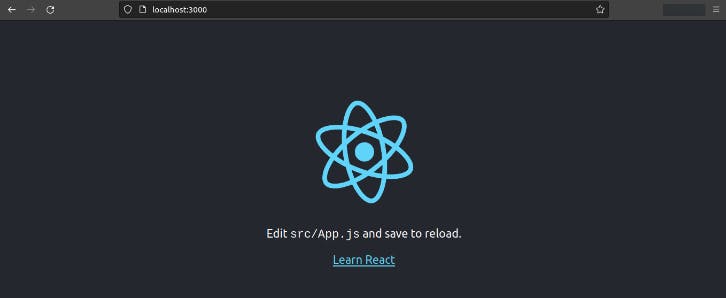
This will start the app in development mode. You can access the app in a browser by opening the following URL:
http://localhost:3000
The app is similar to this:
2. Build a Docker Image for the React App
Once you have created your React app, you need to build a Docker image. This will allow you to deploy the app to Kubernetes.
To build a Docker image for your React app, create a Dockerfile. The Dockerfile is a text file specifying the steps Docker needs to take to build your image.
A simple Dockerfile for a React app might look like this:
# Use an official Node runtime as a parent image
FROM node:16-alpine
# Set the working directory to /app
WORKDIR /app
# Copy package.json and package-lock.json to the container
COPY package*.json ./
# Install dependencies
RUN npm install
# Copy the rest of the application code to the container
COPY . .
# Build the production version of the application
RUN npm run build
# Expose port 80 to the outside world
EXPOSE 80
# Run the command to start the server
CMD ["npm", "run", "dev"]
This Dockerfile tells Docker to use the node:16-alpine image as the base image. It then copies the package.json file and the contents of the current directory into the container. It then runs the npm install command to install the dependencies. Finally, it runs the npm run build command to build the production version of the app.

Then add a .dockerignore File that tells docker what to ignore in the build process.
In the .dockerignore add the necessary files/folders to exclude in the build process.
npm-debug.log
.dockerignore
**/.git
**/.DS_Store
**/node_modules
Now, you can build the image by running the following command:
Syntax:
docker build -t <your-image-name> < Dockerfile filepath>
For this tutorial, use this command
docker build -t quotes .
This will build the image and tag it as quotes.
Start a docker container by running the below command
Syntax
docker run -p 80:80 <image name>
Command
docker run -p 80:80 quotes
The command above starts a Docker container with your image and maps your machine port 80 to the container port 80 where your Docker container is running.
To be able to see your React project live, you need to expose your ports by running the below command.
npm run dev --host
The output is similar to this:

Then, open your preferred browser and navigate to http://127.0.0.1:5173/, and you should see your React app.
3. Create a Kubernetes Cluster
Now that you have a Docker image for your React app, you need to create a Kubernetes cluster.
If you are using Minikube, you can start a cluster by running the following command:
minikube start
This will start a single-node Kubernetes cluster on your computer.

4. Create a Deployment
You can deploy your React app once you have created a Kubernetes cluster.
To deploy the app, you need to create a Deployment and a Service.
A Deployment is a Kubernetes object that represents a set of Pods. A Pod is a group of one or more containers that are scheduled together on the same node.
Deploy the application to Minikube using the kubectl command:
kubectl create deployment quotes --image=quotes
The output is similar to this:
service/quotes exposed deployment.apps/quotes
This Deployment will create a single Pod that runs the quotes
Next is to view the deployment:
kubectl get deployments
The output is similar to this:
NAME     READY   UP-TO-DATE   AVAILABLE   AGE
quotes   1/1     1            1           13h
5. Create a Service
A Service is a Kubernetes object that exposes a Pod or a set of Pods to the outside world.
By default, the Pod is only accessible by its internal IP address within the Kubernetes cluster.
You need to expose the pods within the cluster to the outside world to be accessible.
To do this, you need to create a service to expose the ports the application is listening to.
The --type=LoadBalancer flag indicates that you want to expose your Service outside of the cluster.
a. Create a yaml file with the following info
apiVersion: v1
kind: Service
metadata:
  name: quotes
spec:
  selector:
    app: quotes
  ports:
    - protocol: TCP
      port: 80
      targetPort: 3000
  type: LoadBalancer
Then run the below command
kubectl apply -f service.yaml
The output is similar to this:
service/quotes created
You can confirm a service was created by running
kubectl get services
The output is similar to this:
NAME               TYPE           CLUSTER-IP       EXTERNAL-IP   PORT(S)          AGE
quotes             LoadBalancer   10.100.209.187   <pending>     80:30512/TCP     43h
b. Access Your Application:
Use the previous step's external IP or DNS name to access your React application deployed on EKS, or run the command below.
minikube service quotes
The above command serves your app on a browser.
|-----------|--------|-------------|---------------------------|
| NAMESPACE |  NAME  | TARGET PORT |            URL            |
|-----------|--------|-------------|---------------------------|
| default   | quotes |          80 | http://192.168.49.2:30512 |
|-----------|--------|-------------|---------------------------|
🏃  Starting tunnel for service quotes.
|-----------|--------|-------------|------------------------|
| NAMESPACE |  NAME  | TARGET PORT |          URL           |
|-----------|--------|-------------|------------------------|
| default   | quotes |             | http://127.0.0.1:51769 |
|-----------|--------|-------------|------------------------|
🎉  Opening service default/quotes in default browser...
❗  Because you are using a Docker driver on darwin, the terminal needs to be open to run it.